.................................Computer/Chart Plotter & Navigation Aid Index........
..................
......--- Cuda 350 Fish finder/Depth Finder/Chart Plotter ---
When we bought our '90 S it had an .....
.........
...Eagle fish finder/depth finder at the head of the ...
.........
.....the cockpit on the cabin bulkhead. It worked fine until our last trip when the speed wouldn't always work and it would loose the depth occasionally. We decided to look for a new one with our planned trip to Florida and all of the shallow water there.
We finally settled on the Eagle Cuda® 350 S/Map fish finder with its sunlight-viewable, 240V x 160H, 4" film SuperTwist LCD, four-level gray scale display. It has a transducer with built-in temp sensor good for depths down to 600 ft. 60° . It also has a built in GPS and the GPS features include built-in lakes, rivers, Great Lakes and U.S. coastal water detail with navigational aids. It stores up to 1,000 way points and up to 100 retraceable plot trails. For $200 from Cabela's it offered a lot for the money. One other feature we liked was it could send our GPS position to the DSC feature our Standard Horizon Eclipse VHF radio we had bought to replace our dated VHF had.
Even thought it is a simple chart plotter and could send a GPS location you could not download way points to it from SeaClear. I didn't like that, but we had our handheld Garmin Map 76 and our computer/chart plotter that could to that. I figured that the majority of the time the Cuda would handle our GPS needs.
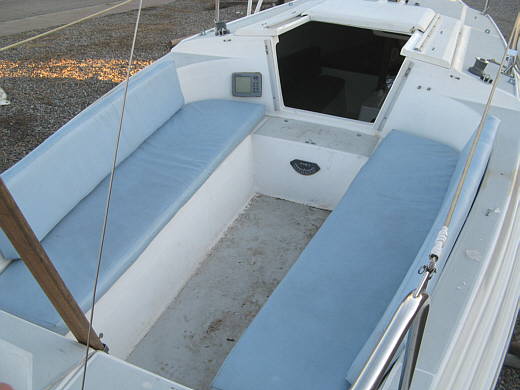
One thing we didn't like with the current depth finder we had was its location. It was very hard for someone on the tiller to see it, especially in some light conditions. When we anchored I would go forward and Ruth would try and yell out depths to me so I could make a decision to anchor or not.
I had a plan on how to maybe alleviate that problem, so if you care to follow along on the build.
Our other depth finder had the transducer shooting through the forward hull up under the V-berth. I liked the fact that it was at the bow, but didn't like the fact that it was shooting down at such a steep angle off the side of the hull. I decided to try mounting this one at the stern of the boat shooting straight down and see if we liked it there.
Also the depth finder displays water temp, but if you have it inside of the hull shooting through the bottom of the hull it is going to display the temp of the hull there, not a true water temp. The Cuda has an auxiliary input that you can hook up an optional temp sensor, but if you do that you can't send the NMEA output for the GPS location to another device. It will do one or the other not both.
.........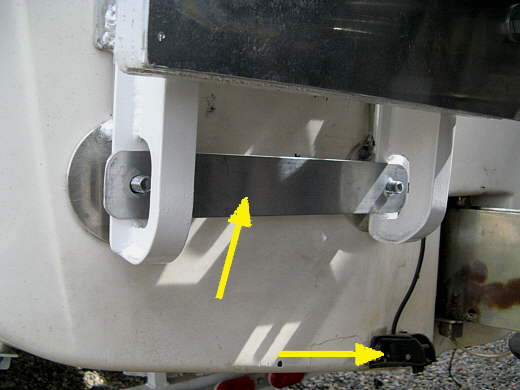
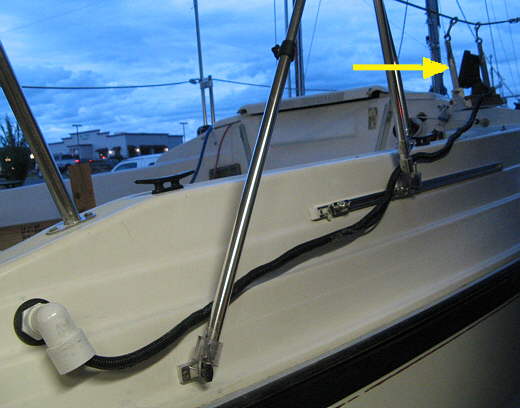
The right arrow points to the speed sensor (wheel) for the old depth finder. I didn't want to drill into the hull for the transducer for the new one, so decided to mount it off of the outboard mount I had made and started with the piece of strap (top arrow) in the picture above.
.........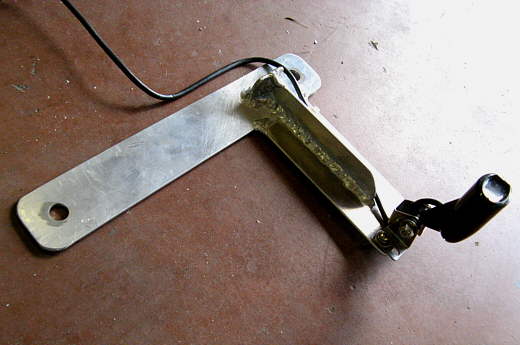
Next a vertical piece was added and reinforced with the transducer on the bottom.
.........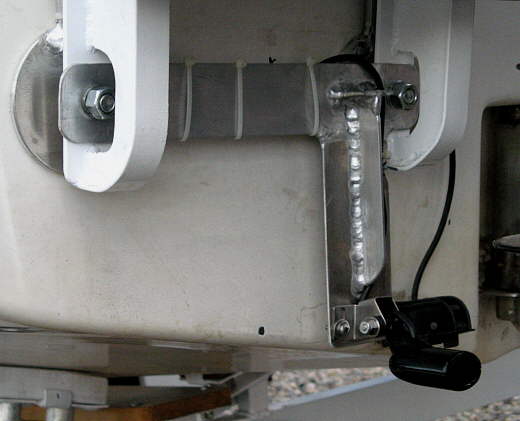
Here it is mounted on the boat with no new holes in the hull below the waterline.
.........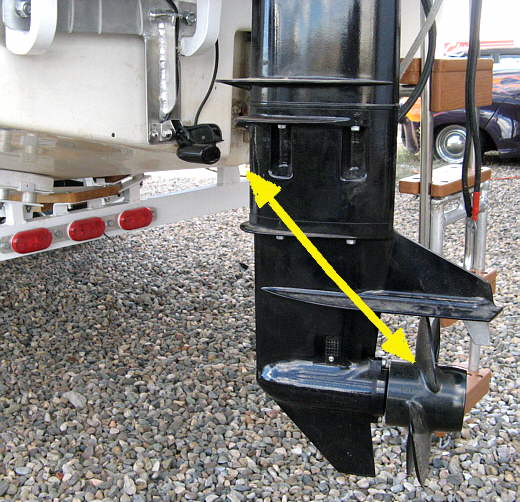
They recommended keeping it at least 12 inches from the prop and it is further than that, but not a lot further. Time will tell if it is ok.
.........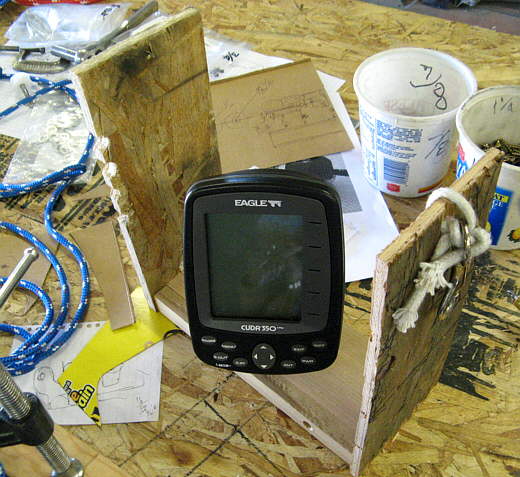
My plan for easier viewing of the display was to mount the Cuda on a platform that could move back and forth on the starboard life-line. I started with a crude wood model to try out the concept. I liked it, so proceeded on.
.........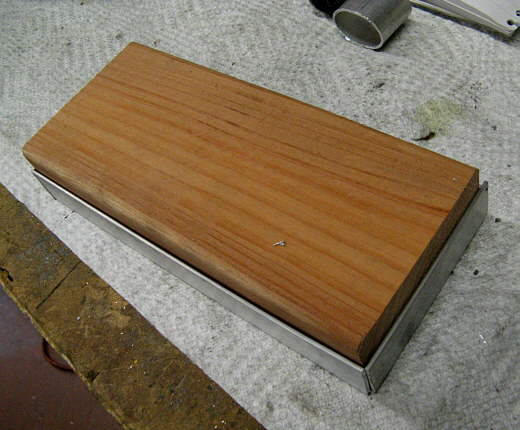
The Cuda will mount on this piece of redwood that will sit in an aluminum base. I cut...
.........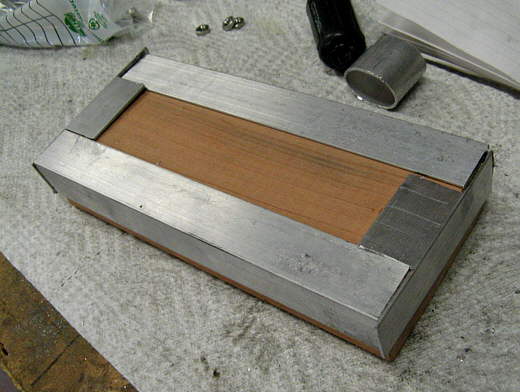
...pieces of aluminum and arranged them how I wanted them and then...
.........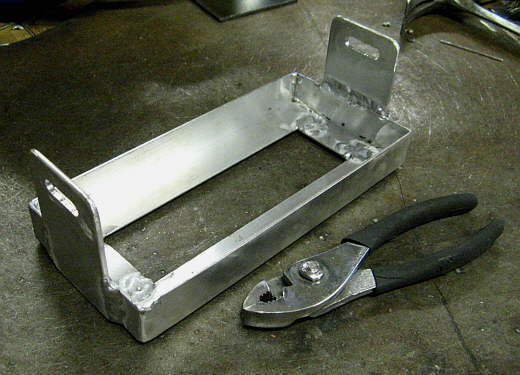
....welded them together. As you can see by the pliers this isn't very big.
.........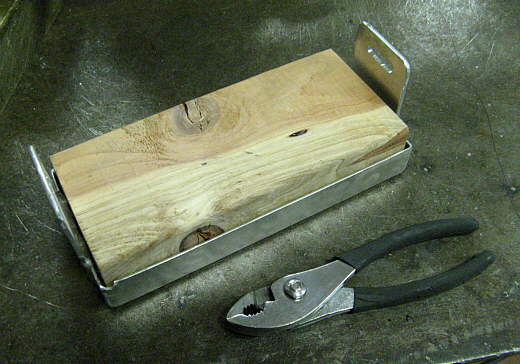
Here I had in another piece of wood while welding .
.........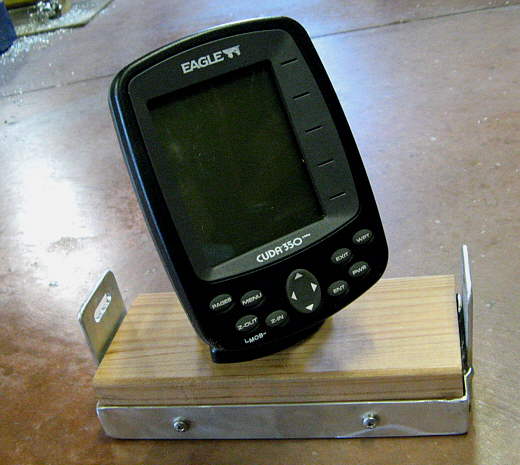
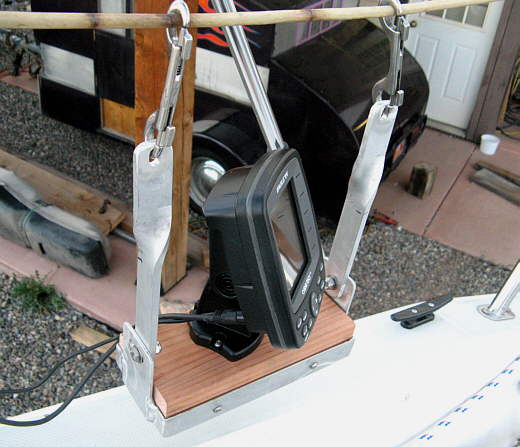
The Cuda sitting on its new perch and...
.........
...riding on the life-line.
.........
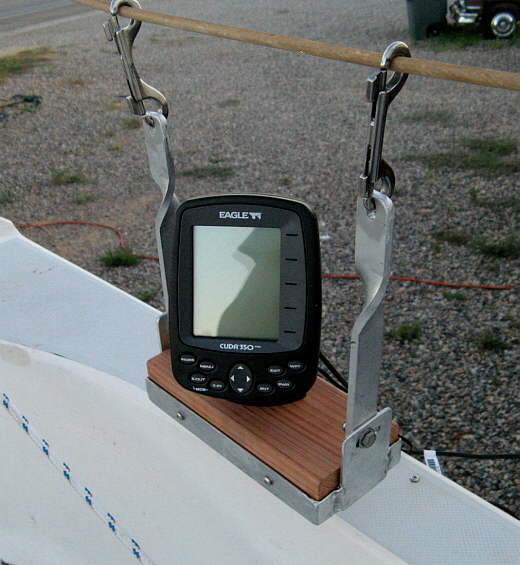
The life-line location makes it easy to move the Cuda ....
.........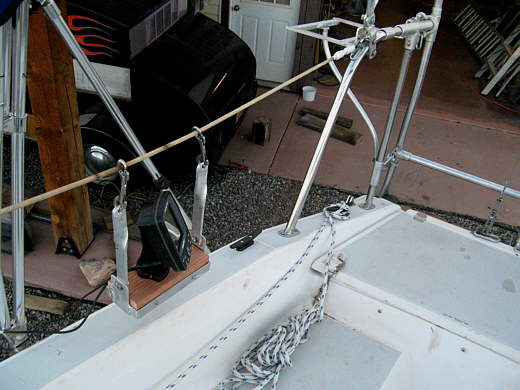
....from the stern where the person is on the tiller to a ....
.........
... more forward position where I can watch it or work the GPS if needed.
.........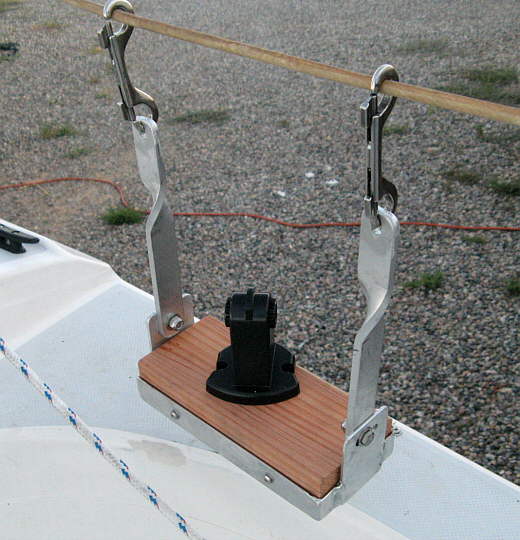
If you squeeze the sides of the base of the Cuda it comes right off the mount and then you can store it inside if needed or remove it if you think someone might help themselves to it.
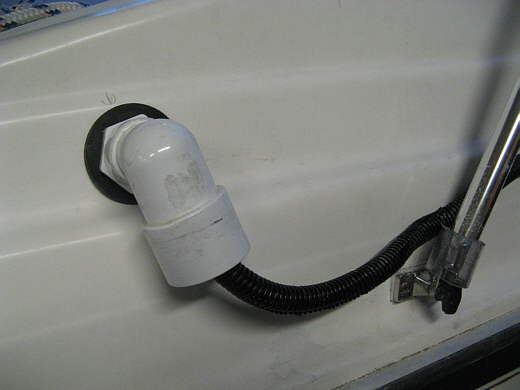
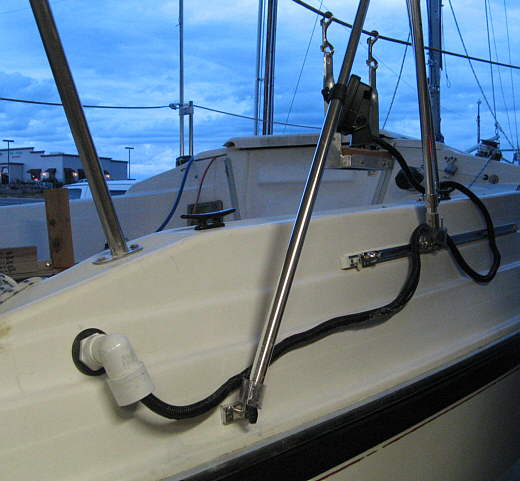
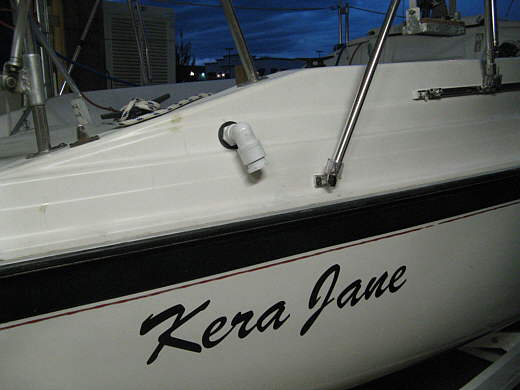
First I ran the cords to it just across the stern and along side the rub-rail on the side of the boat. I wanted to hide some of the wires and also be able to pull them in if the boat was on the trailer or for some other reason, so I went to the hardware store and ....
.........
.... bought the above PVC fittings. The wires to the Cuda will run out the side of the boat by the lazarette through these fittings.
.........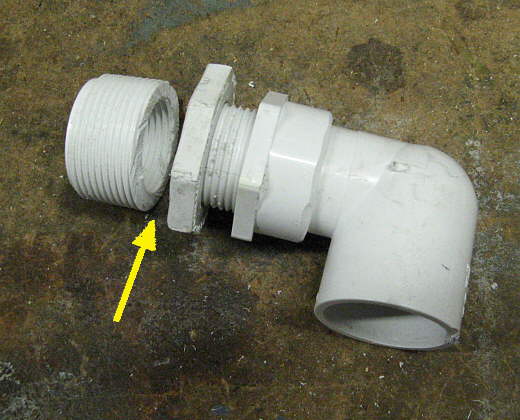
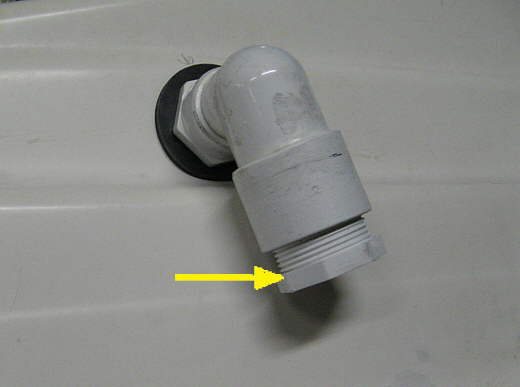
The one fitting was sawed off at its head (arrow), so I could use the head as a stop nut....
.........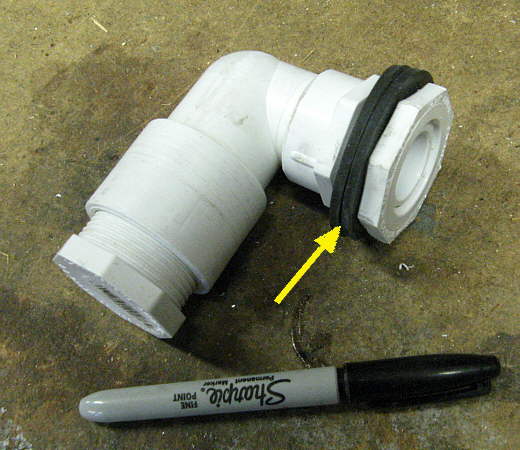
.... on the inside of the hull with the two rubber washers (arrow) on either side of the hull's surface.
.........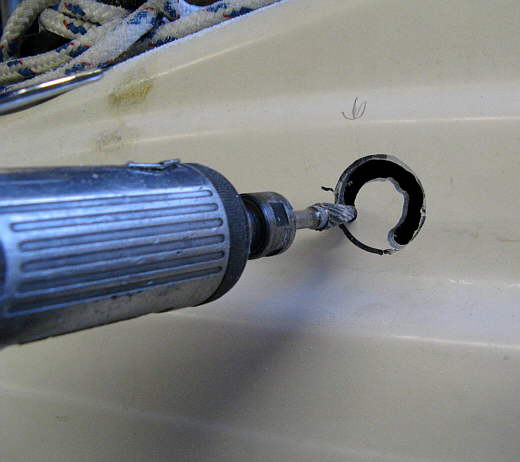
The carbide bit made short work of putting hole the right size in the side of the boat after I drew around the fitting with a felt-tip pen. I could of looked for the right size hole saw, but this was about a minute job this way.
.........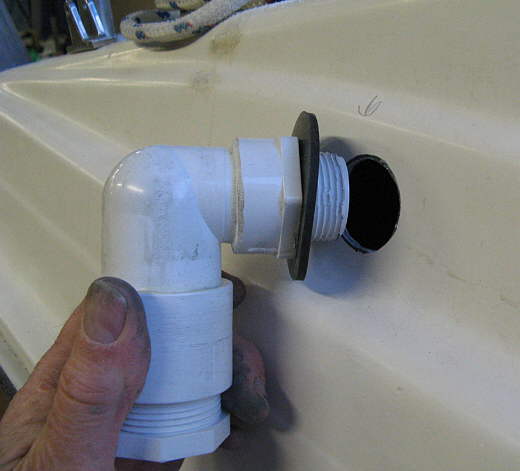
Here the fitting assembly is being placed in the side of the hull and the other washer and stop nut I made will go on the inside.
.........
I picked PVC that was large enough for the wiring and its guard to fit through. I also used the carbide bit a little on the inside of the 90 degree ell to make it smoother and easier to put the wire loom through.
.........
The wire could of exited the boat forward of this location, but I wanted it where it would be easy to either put through the fitting or removed from the fitting.
.........
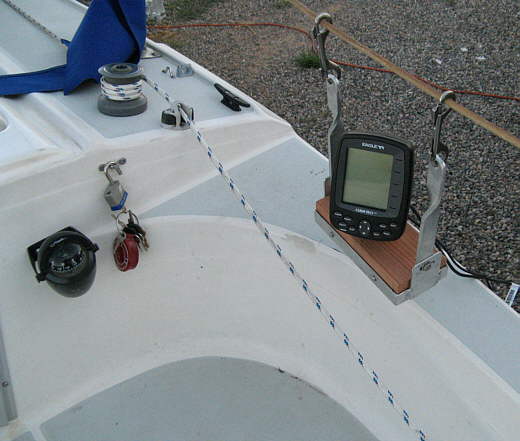
Here the Cuda is back by the helmsman and ....
.........
... here it is forward for the sail handler.
.........
On the road or other times just unplug the cord from the back of the Cuda and pull it into the lazarette and insert the plug (arrow) into the base of the fittings and you....
.........
....are ready to hit the road.
.........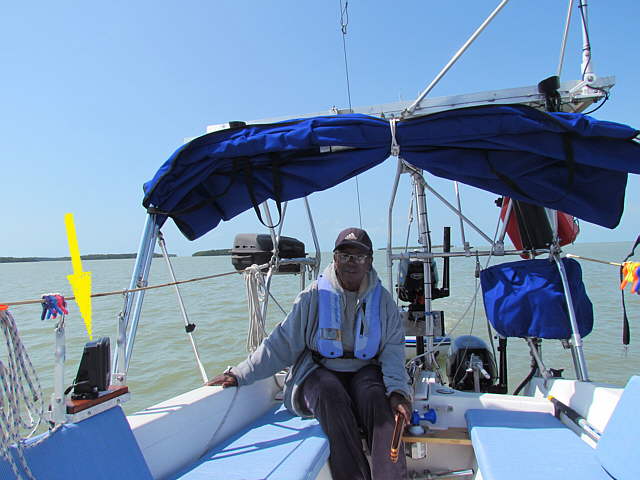
Here we are on the water in the 10,000 Islands of Florida just north of the Everglades. The Cuda, arrow, is pushed forward on the lifeline where I can see it along with Ruth. If we were anchoring or maneuvering in tight/shallow water Ruth would just pull it back closer to her.
After using it in Florida for almost 3 months we are very happy with both the Cuda and how it is mounted and won't be making any changes.